If you were holding your breath waiting for the result of my application for German citizenship, you can start breathing again. 😃
The appointment to submit the documents I had collected was quite anti-climatic. I simply handed them over one by one, keeping the originals, and that was it. I was told that processing would take 6 to 9 months. So I waited.
Last week, after 5 months and 20 days, I received an mail that my application was approved. An appointment to pick up my citizenship certificate was proposed for the first week of April, which was accepted. I need to bring a form, my passport, and my visa card (which will be given up).
Presumably my next steps after that will be to apply for German ID and passport so I can travel out of the country.
This time last year, my wife was preparing for emergency heart surgery and we had no idea why. Her pulse was racing, she was short of breath, and the cardiologist said she had the heart of an unhealthy 80-year-old (she was 60 and healthy). The song “Beautiful Things“, released 6 weeks before, was a reminder of how fleeting the good things in life, and even life itself, can be.
Please stay
I want you, I need you, oh God
Don’t take
These beautiful things that I’ve got
A few days later we had the answer, and the solution. She had been born with a bicuspid aortic valve, with two flaps instead of three. We had no idea, and no examination would detect it unless the one was specifically looking for it. Her aorta had expanded over the years to compensate, but was starting to become clogged. The valve was replaced, and today she is as good as new.
That was a year ago Friday, and this week we will be travelling to Lanzarote (Canary Islands, Spain) to celebrate her new first birthday.

Illustration: Sobotta’s Atlas and Text-book of Human Anatomy 1906
I have an appointment in a few days to submit my German citizenship application and supporting documents. Some people might be interested in the list of papers I was asked to submit. There are some caveats:
- This list from my own local migration office (Landkreis Harburg), other offices may have different specific requirements
- I told them in advance that I was self-employed. Proof of income for an employee might be different.
- The documents should be originals or certified copies
- Documents not in German should be accompanied by a German translation
- The office asked to have all documents submitted at once together with the application
Here’s the list (the poor English translation is mine).
- ID papers: passport, visa (Ausweispapiere: Pass, Aufenthaltstitel)
- Handwritten, detailed, non-tabular CV (handschriftlicher, ausführlicher, nicht tabellarischer Lebenslauf)
- Current photo (Lichtbild)
- Birth certificate, birth certificates of children (Geburtsurkunde, Geburtsurkunden der Kinder)
- Marriage certificate current marriage (Heiratsurkunde jetzige Ehe)
- Marriage certificate of previous marriage and divorce decree (Heiratsurkunde früherer Ehe und Scheidungsurteil)
- Income tax statements, latest and second to last (Einkommensteuerbescheide, letzter und vorletzter)
- Financial statement if self-employed (Betriebswirtschaftliche Auswertung bei Selbständigen)
- Proof of health and long-term care insurance (Nachweise Kranken- und Pflegeversicherung)
- Proof of pension (Nachweis Altersversicherung: Versicherungsverlauf der Deutschen Rentenversicherung)
- Proof of passed citizenship test (Nachweis über die erfolgreiche Teilnahme an einem Einbürgerungstest)
- Proof of German language skills (Nachweis über Sprachkenntnisse: Zertifikat Deutsch Stufe B1, Hauptschulabschluss, Studium, oder Berufsausbildung)
The blog generator bloggrify is based on nuxt-content and generates a RSS feed as a server route in nuxtjs using the feed package from npm. However, try as I may, I was unable to add the cloud element to the feed. The cloud element is used to notify feed readers (like FeedLand) that the feed has been updated. It’s a standard element for RSS, and I was surprised it could not simply be added to the generating the feed.
I ended up rewriting the route using jstoxml so I can choose my own elements.
import jstoxml from 'jstoxml'
const { toXML } = jstoxml
// config contains data for title, description, etc.
const content = {
    _name: 'rss',
    _attrs: {
        version: '2.0',
    },
    _content: {
        channel: [
            { title: config.name },
            { description: config.description },
            { link: url },
            { docs: 'http://cyber.law.harvard.edu/rss/rss.html' },
            { language: config.language },
            { favicon: url + '/favicon.ico' },
            { copyright: `All rights reserved ${now.getFullYear()}, ${config.name}` },
            { generator: 'bloggrify-smh' },
            {
                _name: 'cloud',
                _attrs: {
                    domain: 'rpc.rsscloud.io',
                    port: 5337,
                    path: '/pleaseNotify',
                    registerProcedure: 'http-post',
                },
            },
        ],
    },
}
// After adding items content (code omitted), generate the feed
const configXML = {
    indent: '  ',
}
return toXML(content, configXML)
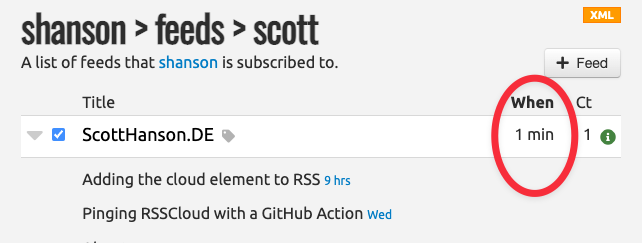
FeedLand seems to accept the feed, and this post will be a test of whether the ping goes through or not. 😃
Update It worked! rsscloud.io was pinged, and FeedLand updated the feed.
A lot has changed since I last wrote about RSSCloud. I now host my blog myself on Hetzner instead of using Netlify. The blog now consist of static files generated by a nuxt.js app based on bloggrify. My simple setup no longer can ping RSSCloud itself when it changes. However, since I still push updates through GitHub, I can run a GitHub action every time I push to my repository.
name: Ping RSSCloud

on:
    push:
        branches:
            - main

jobs:
    ping-rsscloud:
        runs-on: ubuntu-latest
        steps:
            - name: Ping RSSCloud
              run: |
                  curl -X POST "http://rpc.rsscloud.io:5337/ping" \
                  -d "url=https://scotthanson.de/rss.xml"
And that’s all! RSSCloud sends a success message in response, but since the GitHub Action doesn’t have server running, no one is listening. And, of course, this post is also to test whether the ping is working. 😃
Update It doesn’t work as expected! It takes a couple of minutes to rebuild my blog after GitHub is updated, so the ping is sent before the RSS file is updated. Back to the drawing board!
Update 2 I ended up solving this a different way. I can run commands on the Hetzner server after the build is complete, so I can use curl to send the ping.
curl -X POST "http://rpc.rsscloud.io:5337/ping" -d "url=https://scotthanson.de/rss.xml"
One way to connect a blog to RSS readers and communities (like FeedLand) is to ping an RSSCloud server whenever your feed changes. But with the Jamstack model of triggering deploys to a static site hoster, I wasn’t sure how to implement that, and a web search did not offer much help.
nHowever, my hoster Netlify offers serverless functions (as do similar hosters like Vercel, Cloudflare Pages, DigitalOcean Apps, etc.). Specifically, I can run a function on a “deploy-successful” event, so I know the blog has just been rebuilt. RSSCloud expects a POST request, so I can send that off with node-fetch.
nconst fetch = require('node-fetch')nnconst handler = async function (_event, _context) {n try {n const params = new URLSearchParams()n params.append('url', 'https://scotthanson.de/feed.xml')nn const response = await fetch('http://rpc.rsscloud.io:5337/ping', {n method: 'POST',n headers: { Accept: 'application/json' },n body: params,n })n const data = await response.json()n console.log(data)n } catch (error) {n // output to netlify function logn console.log(error)n }n}nnmodule.exports = { handler }nNow RSS readers that listen to RSSCloud servers will know about changes to my feed within seconds.
]]>Time to tighten and grease all the hinges, we have to get it working again for the post-Twitter apocalypse.
This is a good time to put an end to this year. Here’s hoping for a better 2022! 🥳
I’m rebranding! I’m now using my name as my digital identity.
“PapaScott” arose from a whim when I started my blog on edithispage.com in December 1999, since we were going to become parents that very month. My wife and I were calling each other PapaScott and MamaMaus, as silly expectant parents will do. I ended up using PapaScott as my handle for most services when signing up.
I’ve been changing my handles to “ScottHansonDE” over the past few months. I’ve been reviving my blog over the past few weeks, and I’ve done the same here. The new blog has a new design (thanks yinka!) and a new back end (eleventy). I’ve put my posts from 2021 there to get started. So from now on follow me on scotthanson.de, if you like!
I’ve started a GitHub repository at scotthansonde/DrummerNotes for my notes and code about Drummer. I’m cross-posting my first note on using Caddy with PagePark here. PagePark is a”simple Node.js folder-based HTTP server that serves static and dynamic pages for domains”. It isn’t about Drummer per se, but would be a possible path for Drummer itself to run under HTTPS. This post is also a test of uploading Markdown from Drummer directly to a Gatsby blog.
Caddy is a very easy way to implement HTTPS for your PagePage domains. It is a web server that can do automatic HTTPS, automatically provisioning TLS certificates (from Let’s Encrypt) for a domain and keep them renewed. It can even obtain TLS certificates on demand for your PagePark domains, without out having to configure the domains in Caddy.
How to
Here is an example of setting up Caddy on an existing PagePark installation on a Digital Ocean server running Ubuntu (assuming you have domains in your domains folder and have mapped port 80 to PagePark using iptables as in the instructions).
-
Install the official Caddy package für Ubuntu per their instructions. This automatically starts and runs Caddy as a systemd service.
-
Open the Caddy configuration file in the nano editor with
sudo nano /etc/caddy/Caddyfile -
Replace the entire contents with:
{
  on_demand_tls {
    ask http://localhost:1339/isdomainvalid
    interval 2m
    burst    5
  }
}
https:// {
  tls {
    on_demand
  }
  reverse_proxy localhost:1339
}
-
Restart the Caddy service with
sudo service caddy restart -
Test https for one of your domains in the terminal with curl: e.g.
curl https://www.example.com. This first time it will take several seconds for Caddy to request and obtain a certificate. It may even fail the first time, but then try again. The content of the index page of your domain should be printed to the terminal. That means it works!
This configuration means that both HTTP (over iptables) and HTTPS (over Caddy) will work for your domains!
Further cases and questions
Running Caddy without iptables mapping
If you have not mapped port 80 to PagePark, the configuration above will also listen to port 80 and redirect HTTP requests to HTTPS.
If you’d rather not redirect port 80, you can add a section for HTTP and disable redirects like this:
{
  auto_https disable_redirects
  on_demand_tls {
    ask http://localhost:1339/isdomainvalid
    interval 2m
    burst    5
  }
}
http:// {
  reverse_proxy localhost:1339
}
https:// {
  tls {
    on_demand
  }
  reverse_proxy localhost:1339
}
Removing iptables mapping so Caddy can handle HTTP
To delete an iptables rule you have to know the rule number. You can list the nat rules with
sudo iptables -t nat -v -L -n --line-number
The output will look something like this:

The number in front of the rule is the rule number. To delete these two rules, we need two commands
sudo iptables -t nat -D PREROUTING 1
sudo iptables -t nat -D OUTPUT 1
(changing the 1 at the end if your rule number is different).
What are the ‘ask’, ‘interval’ and ‘burst’ in the configuration?
They are for security purposes. They limit certificate requests to only domains configured in PagePage, and limits the rate of those requests. Otherwise an attacker can bombard your server with certificate requests for domains you don’t even serve.
What about default domains?
Domains that are not explicitly in the domains directory will not be served automatic certificates. You can check the Caddy documentation for adding domains explicitly to the Caddy configuration.